

Pumpkin Hand Pies – Mom On Timeout

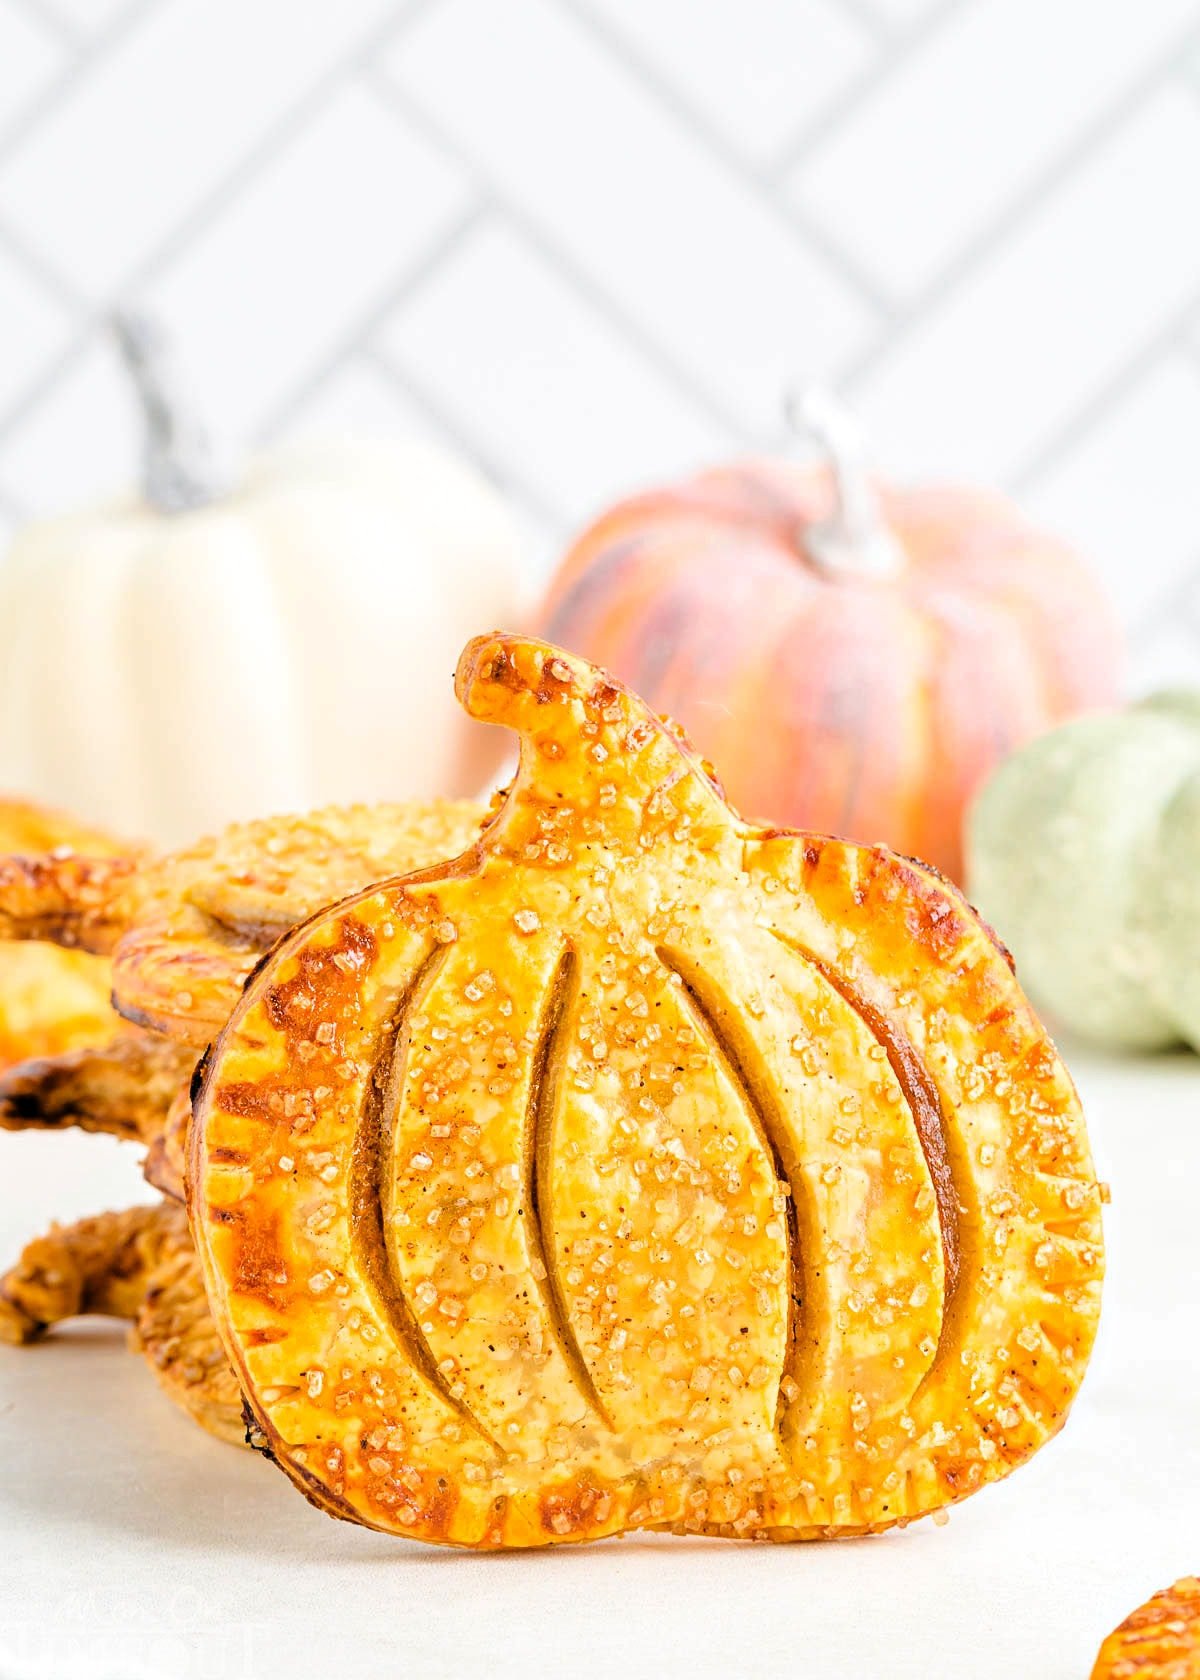
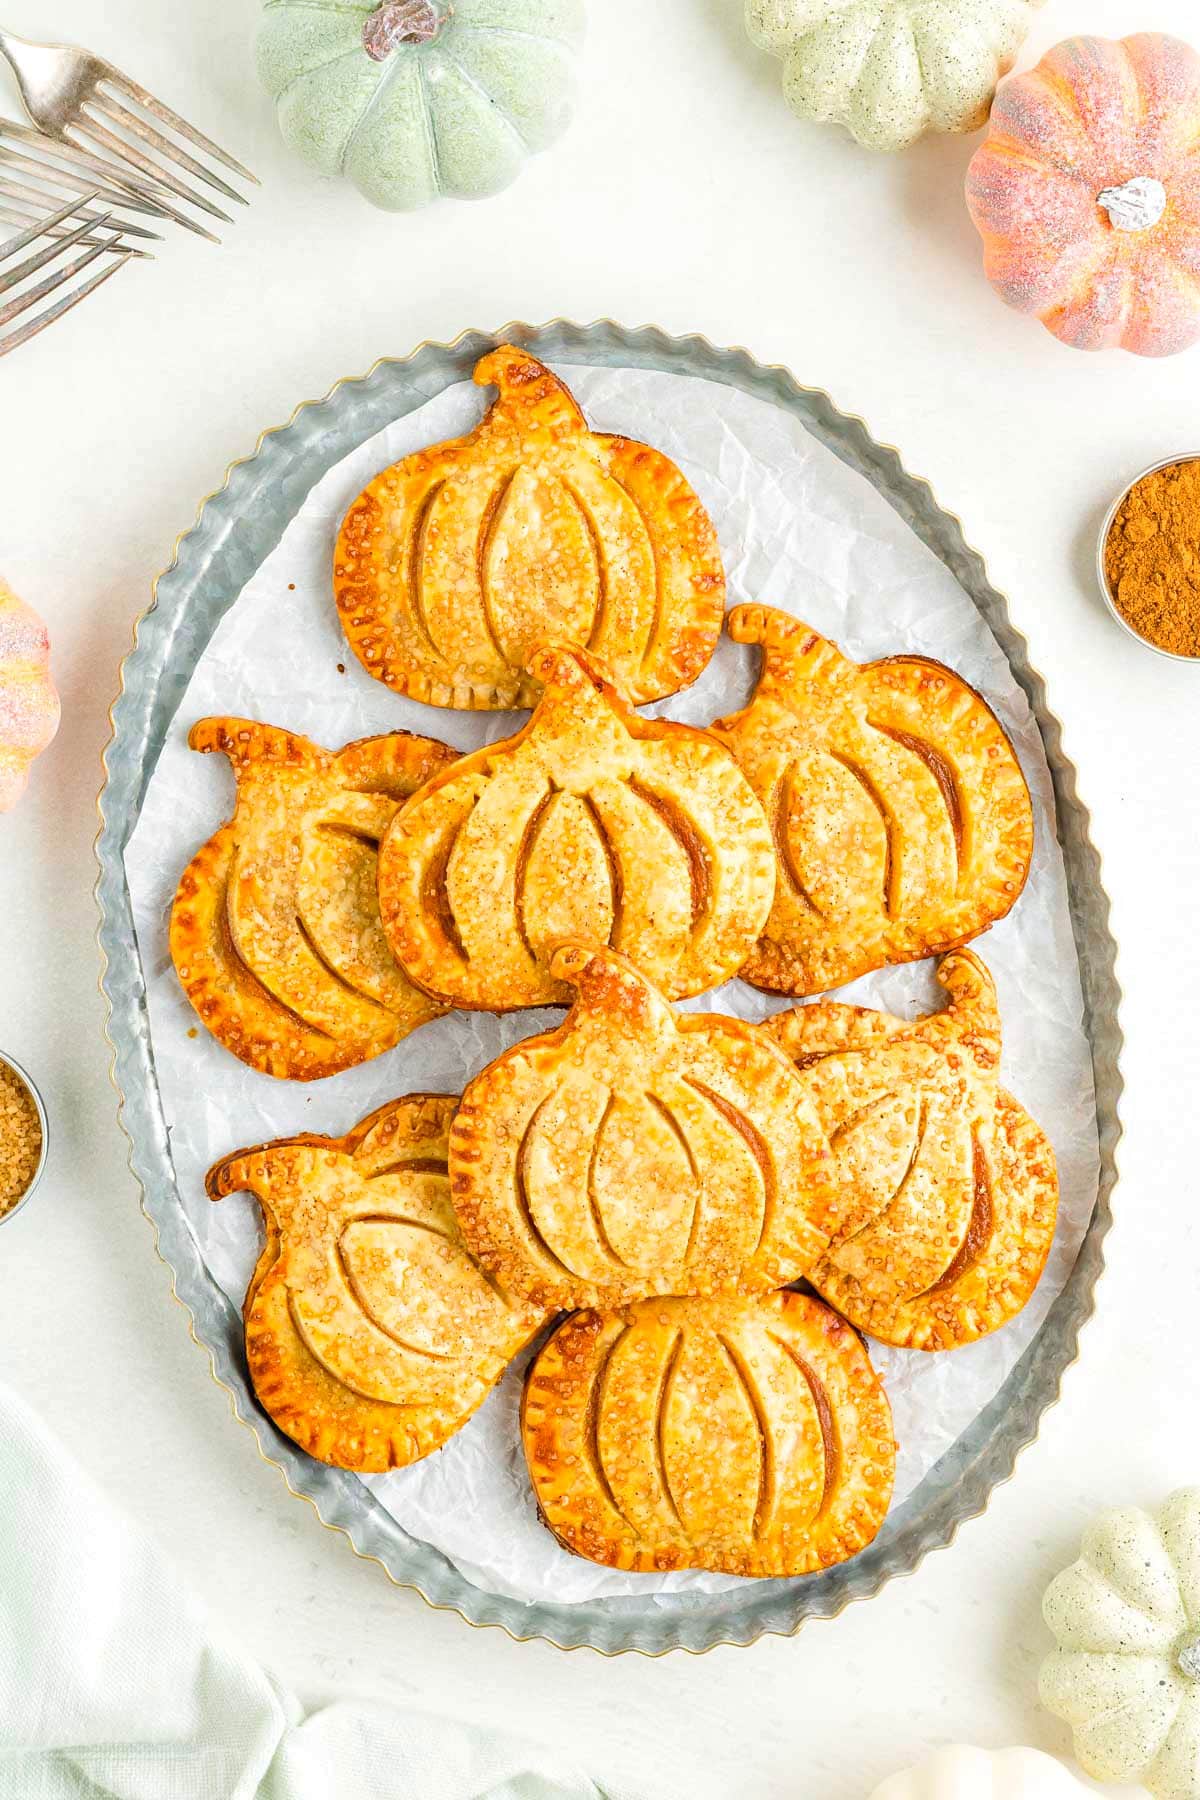
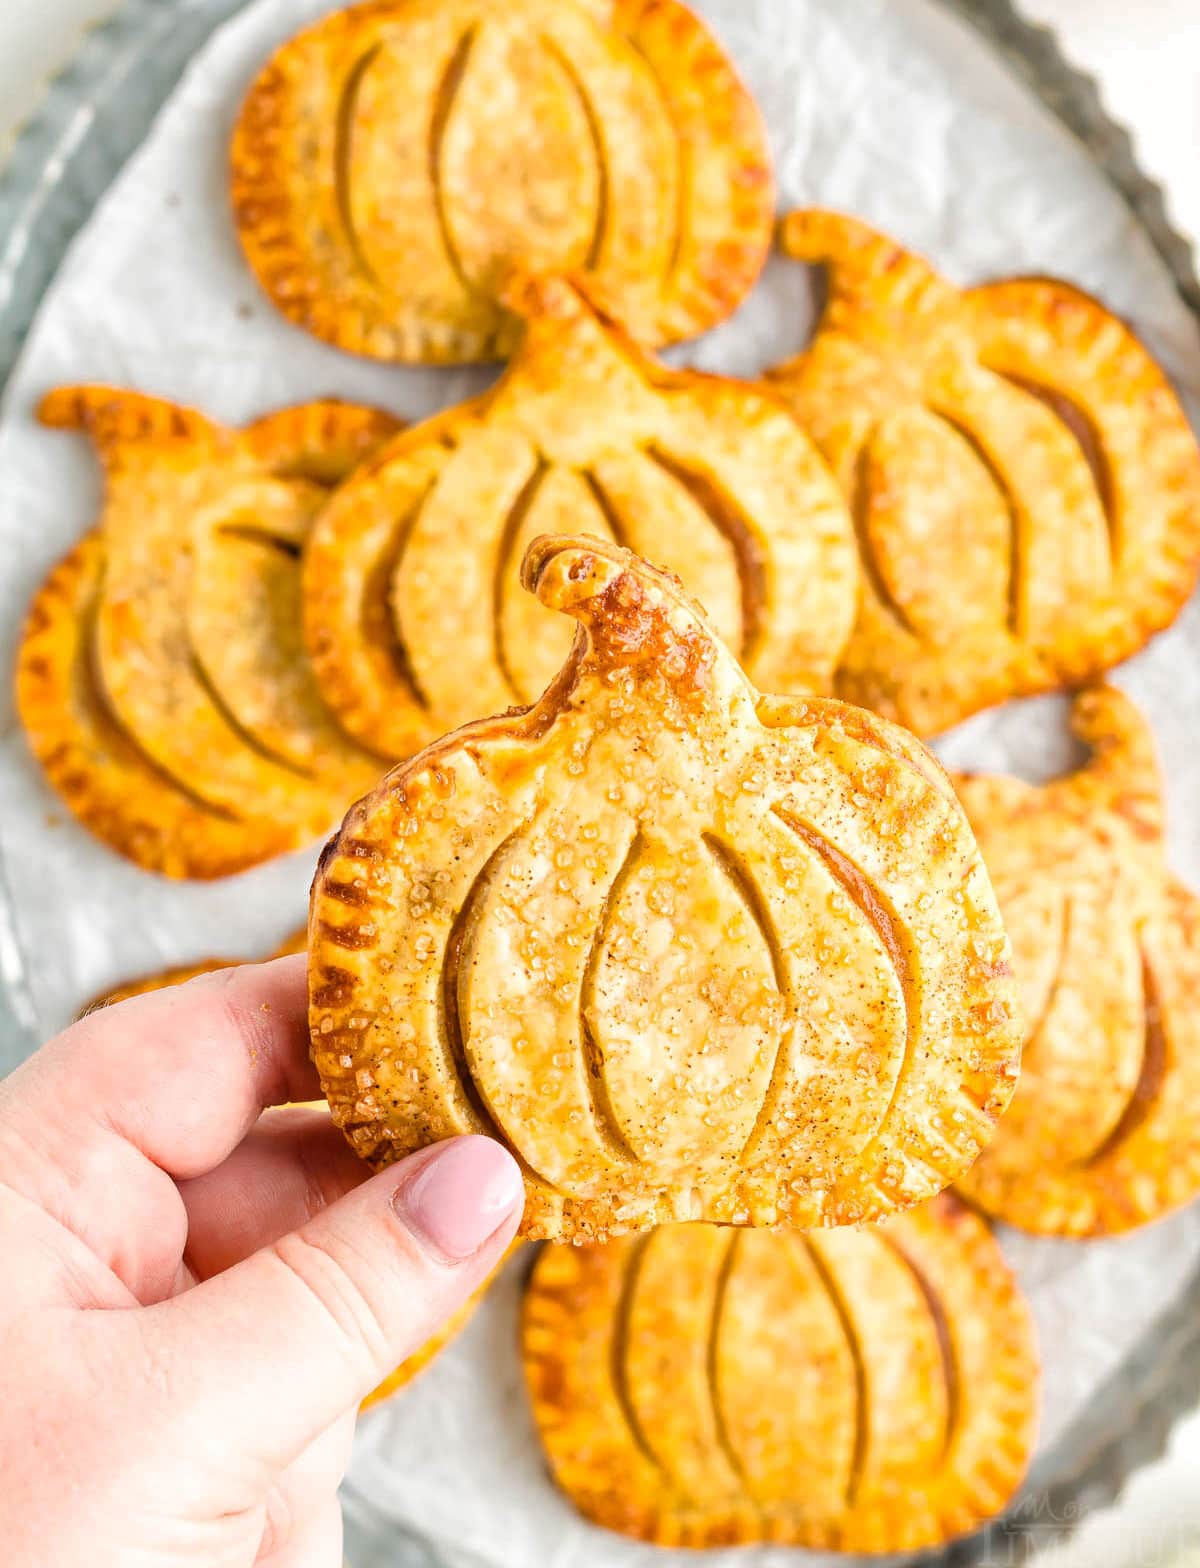
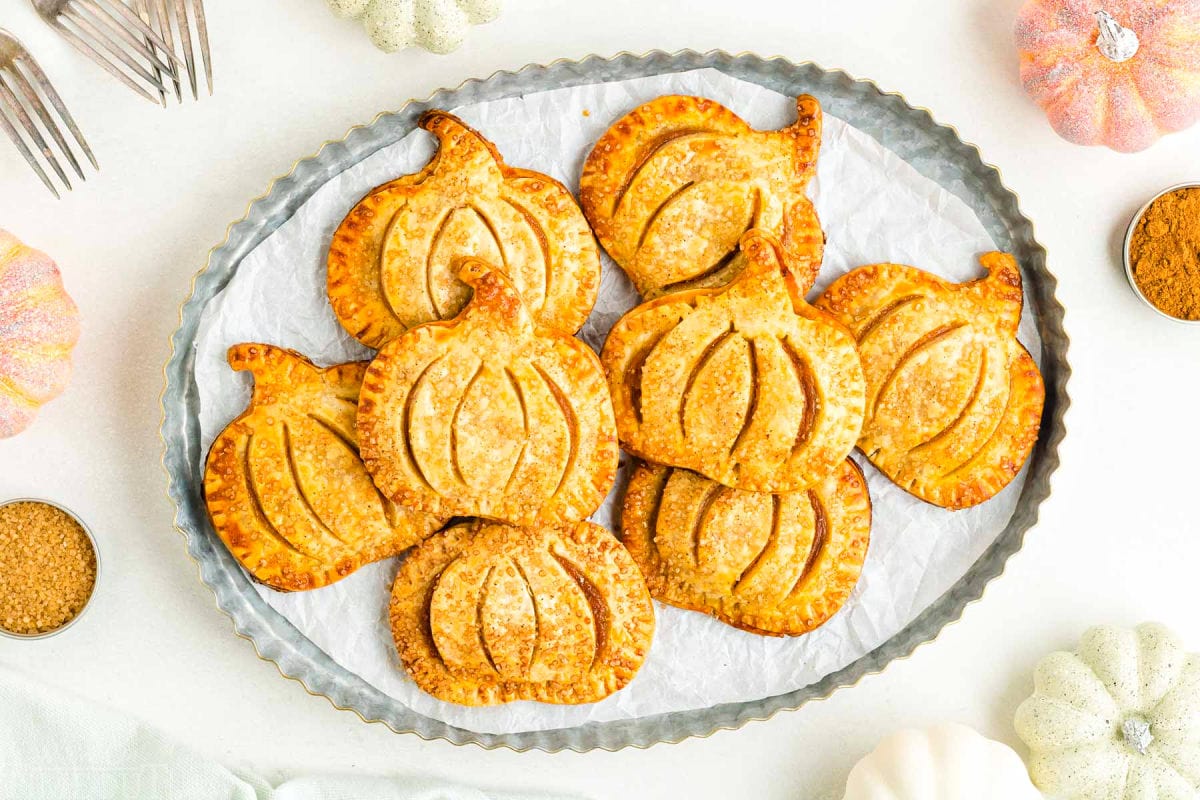
Pumpkin Hand Pies are quick to make and the easiest way to serve pumpkin pie to friends and family. With a creamy, pumpkin pie filling and a flaky crust, they are the ideal hand held treat for the holidays. These adorable pumpkin shaped hand pies are almost too pretty to eat!
Love pumpkin desserts? Make sure to check out my Pumpkin Cheesecake Trifle, Better Than Anything Pumpkin Cake and Pumpkin Delight!
Mini Pumpkin Pies
Sometimes making a pie can seem a little intimidating and although pumpkin pie is relatively simple as far as pies go, making mini pumpkin pies is so much fun and makes serving a breeze. No slicing and plating these hand pies – just grab and go!
This recipe is one that can easily be doubled or tripled depending on your needs. Not only that, but the pies can be made in advance which frees up oven space on heavy baking and cooking days like the holidays.
The creamy pumpkin filling is complemented perfectly with the flaky crust and pumpkin pie spice and sugar topping. So, so good!
Hand Pies are so much fun! Check out these Caramel Apple Hand Pies and Blueberry Hand Pies for a tasty variation on this simple recipe.
More Pumpkin Desserts
You can never have too many options when it comes to pumpkin desserts. Here are even more of our favorites:
- Pumpkin Cake with Chocolate Chips
- Pumpkin Whoopie Pies
- The BEST Pumpkin Chocolate Chip Cookies
- Pumpkin Chocolate Chip Bread
- Pumpkin Brownies
Pumpkin Hand Pie Ingredients
With just a few key ingredients, you’ll be ready to enjoy these tasty hand pies in no time! As always, you can find the full printable recipe with complete instructions in the recipe card at the end of this post. Let’s take a look at what you’ll need:
- refrigerated pie crusts – one 2 count package, use your favorite brand.
Pumpkin Pie Filling
- pumpkin puree – make sure you get canned pumpkin puree and not pumpkin pie filling.
- brown sugar – you can use light or dark brown sugar in this recipe.
- heavy cream – evaporated milk or half and half can be used instead if you don’t have heavy cream,.
- pumpkin pie spice – make your own or use store bought. This is what makes the filling taste like pumpkin pie.
- kosher salt – sea salt can also be used in this recipe.
Topping
- egg – combined with water, this creates the egg wash that when brushed on the tops of the hand pies, gives them a lovely golden brown color when baking.
- coarse sanding sugar – the larger granules add a special touch to the hand pies. Turbinado sugar or baking sugar can also be used.
- pumpkin pie spice – this is mixed in with the sugar to add lots of flavor to the pies.
How To Make Pumpkin Hand Pies
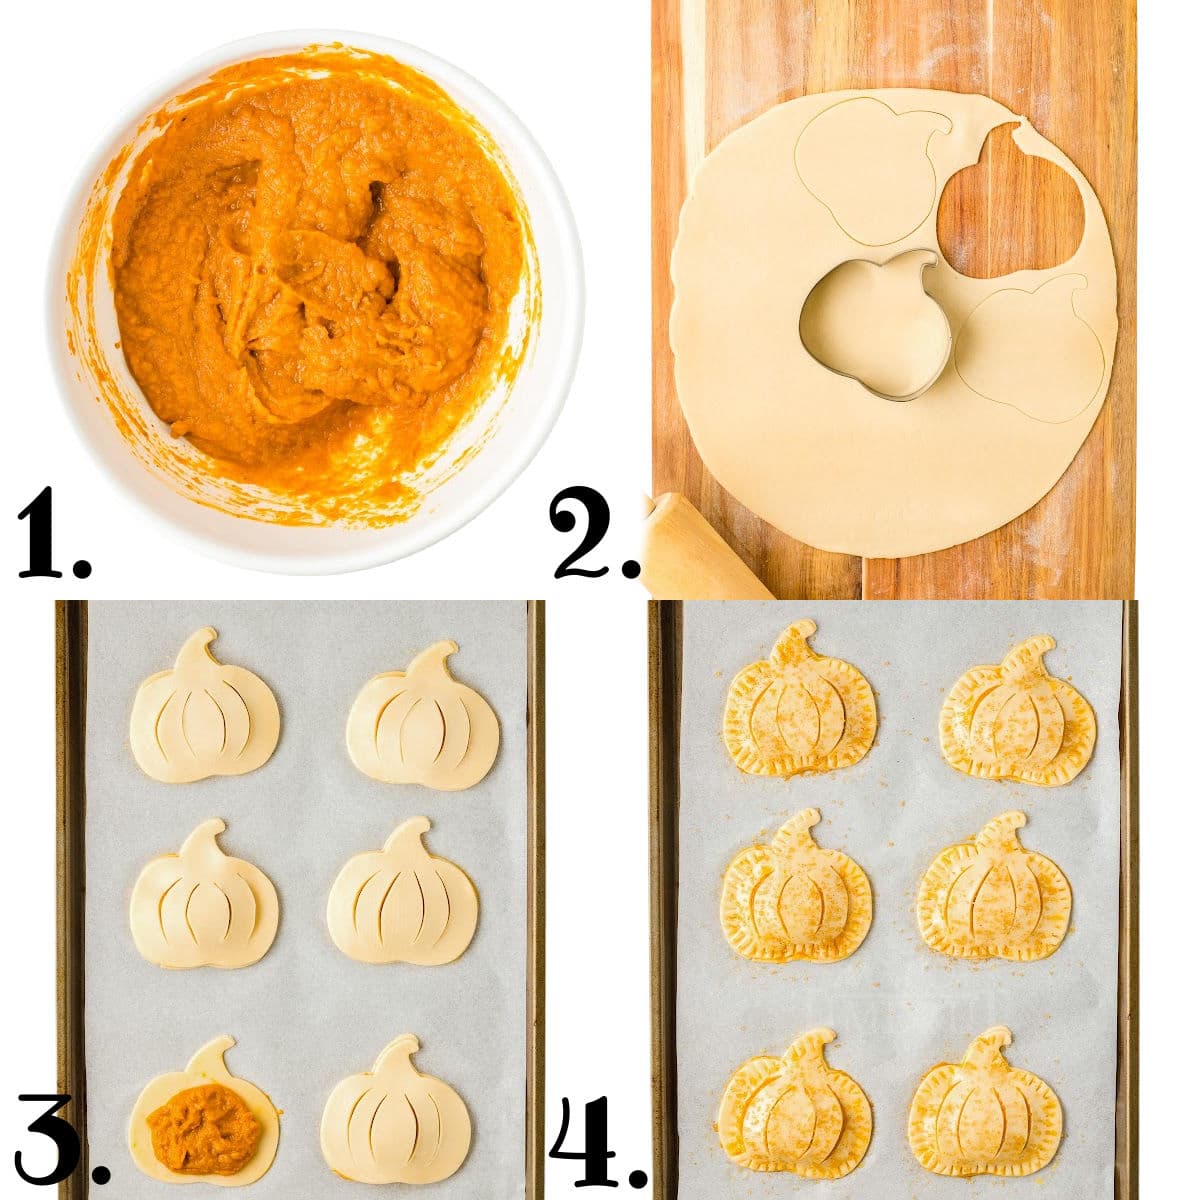
- Preheat the oven to 400°F and line two large baking sheets with parchment paper.
- Carefully unroll the pie crusts and use a rolling pin to gently roll out the dough just enough to remove any creases.
- Cut out pumpkin shapes using a 3 to 4” pumpkin shaped cookie cutter and place on the prepared baking sheets.
- Roll out any scraps and cut out more pumpkins being careful to not overwork the dough.
- Transfer the baking sheets to the refrigerator while you prepare the filing.
Pumpkin Pie Filling
- Whisk together pumpkin puree, brown sugar, heavy cream, pumpkin pie spice and salt in a medium bowl.
- Pull out half of the pumpkin pie crusts and spoon the filling onto the center of each, about 2 to 3 tablespoons depending on the size of your pumpkins, being sure to leave a ⅓” border around the edge.
- Use a small knife to cut four curved slits in the remaining crusts to resemble the ridges of a pumpkin.
Topping
- Lightly whisk the egg with the water to create an egg wash.
- Brush the border of the crusts with the pumpkin filling.
- Place a top crust on each hand pie and lightly press the edges together. Use the tines of a fork to crimp the edges and seal.
- Use the remaining egg wash to brush the tops of the hand pies.
- Mix the sanding sugar and pumpkin pie spice together in a small bowl and sprinkle over the top of the pumpkins.
- Bake the hand pies for 15 to 20 minutes or until the crust is golden brown. If the edges start to get too brown you can place small strips of foil over the edges to keep them from browning. This might be necessary for the stems of the pumpkins.
- Let the pies rest for 5 minutes on the baking sheet before transferring to a cooling rack or enjoying.
Use any shape cookie cutter you like to make the pies. The cookie cutters should be between 3 and 4 inches and be sure to cut vents into the top crust before assembling. If you decide to use a smaller cookie cutter, the pies will take a little less time to bake so start checking on them around 10 minutes to make sure they don’t get too dark.
Storage Information
Leftover pumpkin hand pies should be cooled to room temperature before transferring to an airtight storage container and stored in the refrigerator for up to 4 days.
To reheat: Preheat oven to 350°F and bake for 8 to 10 minutes or pop in the air fryer at 350°F for 2 to 3 minutes.
To freeze: Unbaked, assembled pies can be frozen for up to two months. Place pies on a parchment lined baking sheet and freeze for 30 minutes. Transfer frozen pies to a freezer safe, airtight container or ziploc bag. When you are ready to bake, defrost the pies in the refrigerator, brush with the egg wash and top with the pumpkin pie spice and mixture. Bake as directed.

Hand Pies FAQs
Yes! This recipe is a great make-ahead dessert option. The hand pies can be made up to 2 days in advance. Store at room temperature in an airtight container. Alternatively, assemble the pies up to 2 days in advance (waiting to add the egg wash and sugar sprinkle) and store the unbaked pies in a single layer in an airtight container for up to 2 days in the refrigerator. When you are ready to bake, brush on the egg wash and sprinkle with the sugar and pumpkin pie spice mixture.
Absolutely not although I love the added sweetness and texture that sanding sugar provides. If you don’t have raw, coarse or sanding sugar available to use, standard granulated sugar will also work.
Yes. To freeze, cool pies to room temperature and then flash freeze on a parchment lined baking sheet for 30 minute before transferring to a freezer safe ziploc bag. When you’re ready to enjoy, thaw hand pies at room temperature before enjoying. To reheat the pies, simply place in a 300°F oven for about 5 minutes to toast them up a bit.
Trish’s Tips and Tricks
- Be creative with the pumpkin shapes. Use more than one cookie cutter to get a variety of pumpkin shapes for your hand pies. The more the merrier. Just make sure to cut out the shapes in pairs.
- The slits in the top are more than just decorative. Although the slits mimic the natural grooves in a pumpkin, they also act as the air slits to keep the pies from exploding while baking.
- Instead of, or in addition to, consider a simple glaze made with powdered sugar, milk and pumpkin pie spice to drizzle on top of these sweet pumpkin hand pies.
- Serve these adorable treats on their own or with whipped cream or vanilla ice cream.
Holiday Approved Pumpkin Desserts
- Pumpkin Bars
- Praline Pumpkin Roll
- Pumpkin Delight
- Cranberry Pecan Pumpkin Bread
- Pumpkin Lasagna
How To Make Pumpkin Hand Pies
Pumpkin Hand Pies
Pumpkin Hand Pies are quick to make and the easiest way to serve pumpkin pie to friends and family. With a creamy, pumpkin pie filling and a flaky crust, they are the ideal hand held treat for the holidays. These adorable pumpkin shaped hand pies are almost too pretty to eat!
Ingredients
- 2 refrigerated pie crusts one 2 count package
Pumpkin Pie Filling
- 1 cup pumpkin puree *not pumpkin pie filling
- ⅓ cup brown sugar packed
- 2 tablespoons heavy cream
- 1 ½ teaspoons pumpkin pie spice divided
- ¼ teaspoon kosher salt
Topping
- 1 egg
- 1 teaspoon water
- 2 tablespoons coarse sanding sugar turbinado sugar or baking sugar, optional
- ½ teaspoon pumpkin pie spice
Instructions
-
Preheat the oven to 400°F. Line two large baking sheets with parchment paper, set aside.
-
Dust a flat surface with flour and carefully unroll the pie crusts. Use a rolling pin to gently roll out the dough just enough to remove any creases (being careful not to over roll the dough and make it too thin).
2 refrigerated pie crusts
-
Cut out pumpkin shapes using a 3 to 4” pumpkin shaped cookie cutter and place on the prepared baking sheets. Roll out any scraps and cut out more pumpkins being careful to not overwork the dough. You should get between 8 and 10 pumpkins from each pie crust for a total of 16 to 20 pumpkins. Transfer the baking sheets to the refrigerator while you prepare the filing.
Pumpkin Pie Filling
-
Whisk together pumpkin puree, brown sugar, heavy cream, pumpkin pie spice and salt in a medium bowl
1 cup pumpkin puree, ⅓ cup brown sugar, 2 tablespoons heavy cream, 1 ½ teaspoons pumpkin pie spice, ¼ teaspoon kosher salt
-
Remove one of the trays of pumpkin crusts. Spoon the filing onto the center of each pumpkin, about 2 to 3 tablespoons depending on the size of your pumpkins, being sure to leave a ⅓” border around the edge.
-
Remove the other tray of pumpkin crusts and use a small knife to cut four curved slits in the crusts to resemble the ridges of a pumpkin.
Topping
-
In a small bowl, lightly whisk the egg with the water to create an egg wash. Use a pastry brush to brush the border of the crusts with the pumpkin filling. Carefully place a top crust on each and lightly press the edges together. Use the tines of a fork to crimp the edges and seal.
1 teaspoon water, 1 egg
-
Use the remaining egg wash to brush the tops of the hand pies. Mix the sanding sugar and pumpkin pie spice together in a small bowl and sprinkle over the top of the pumpkins.
½ teaspoon pumpkin pie spice, 2 tablespoons coarse sanding sugar
-
Bake the hand pies for 15 to 20 minutes or until the crust is golden brown. If the edges start to get too brown you can place small strips of foil over the edges to keep them from browning. This might be necessary for the stems of the pumpkins.
-
Let the hand pies rest for 5 minutes on the baking sheet before transferring to a cooling rack or enjoying.
Notes
Leftover pumpkin hand pies should be cooled to room temperature before transferring to an airtight storage container and stored in the refrigerator for up to 4 days.
To reheat: Preheat oven to 350°F and bake for 8 to 10 minutes or pop in the air fryer at 350°F for 2 to 3 minutes.
To freeze: Unbaked, assembled pies can be frozen for up to two months. Place pies on a parchment lined baking sheet and freeze for 30 minutes. Transfer frozen pies to a freezer safe, airtight container or ziploc bag. When you are ready to bake, defrost the pies in the refrigerator, brush with the egg wash and top with the pumpkin pie spice and mixture. Bake as directed.
Nutrition
Calories: 411kcal | Carbohydrates: 52g | Protein: 6g | Fat: 20g | Saturated Fat: 7g | Polyunsaturated Fat: 2g | Monounsaturated Fat: 9g | Trans Fat: 0.003g | Cholesterol: 33mg | Sodium: 387mg | Potassium: 186mg | Fiber: 3g | Sugar: 17g | Vitamin A: 6470IU | Vitamin C: 2mg | Calcium: 46mg | Iron: 3mg